Hello fellow Zetor friends ")
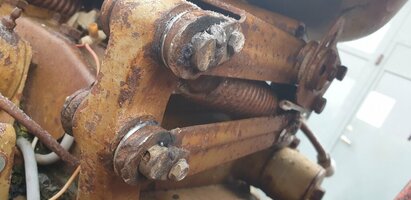
I'm renovating the old bucket seat on my 3511. The tractor stood still in a barn for about 25 years, and the whole seat foundation/frame is rusted solid. Nothing is moving.
So I'm dismantling everything, and (after sanding and painting) It will hopefully be good again.
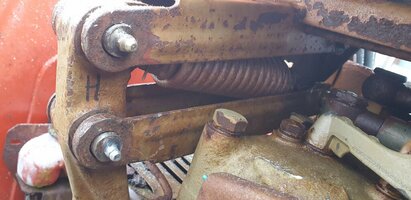
When taking out the pins/bolts holding the moving frame parts together, I noticed there are some kind of shim between the pin and the hole.
What is it called, and what is the purpose of this?
Found this video on the tube where this guy is doing the same job, but I don't speak the language....
View: https://www.youtube.com/watch?v=HK8cjQyFxsI&t=1068s
From about 17:40 into the movie, you can see he starts to prepare these shims.

I'm renovating the old bucket seat on my 3511. The tractor stood still in a barn for about 25 years, and the whole seat foundation/frame is rusted solid. Nothing is moving
.So I'm dismantling everything, and (after sanding and painting) It will hopefully be good again.
When taking out the pins/bolts holding the moving frame parts together, I noticed there are some kind of shim between the pin and the hole.
What is it called, and what is the purpose of this?
Found this video on the tube where this guy is doing the same job, but I don't speak the language....
View: https://www.youtube.com/watch?v=HK8cjQyFxsI&t=1068s
From about 17:40 into the movie, you can see he starts to prepare these shims.
 Drilled out the pins and added grease nipples, put everything in position and fixed the pins by 6mm bolts and small fins welded to the end of the pins. Not pretty but will surely outlast me