• Hello.
    In order to download file attachments or view image attachments in full size, you must be registered/logged in and have a level 2 member account.
    No worry, its all for free!
    For more details - click here.

question Zetor 5718 repairs

Sweden ludvig

Member
Level 2
Joined
Oct 13, 2024
Messages
5
Location
SkellefteƄ, Sweden
First name
Ludvig

Machinery:
Zetor 5718
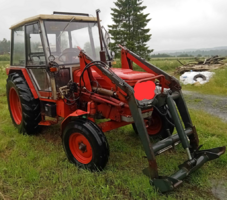
Hello, I recently bought my first own tractor a Zetor 5718 which I am going to repaint and fix. From the 4 hour drive home I find it to be a lovely tractor, nice that it has a suspended front axle too. Going to be used for getting rid of snow and some lighter work like a hay rake and a tedder. I thought I'd register on a forum if I needed to ask any questions, and I already have some šŸ˜
Zetor 5718.png

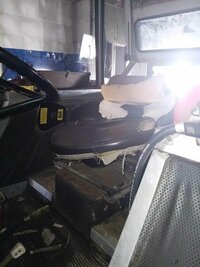
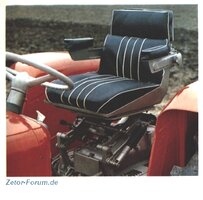
I've downloaded some spare parts catalogs of the internet and I can't really seem to find the right seat, I kind of wanted to have the original seats and not buy a different one but the old seat is not really in great shape. Also from the instruction book it says there should be bolts to lock the front axle suspension for doing work with a front loader, what do these look like? Are they just normal bolts? I can't seem to find any in the toolbox so I assume they are gone.
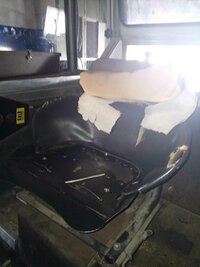
zetor 5718 sits.jpgzetor 5718 sits 2.jpg
 
Hello and welcome Ludvig! :)

Your seat is not an original seat but a third-party seat (accessory). Therefore, you will not find it in any Zetor spare parts catalog.
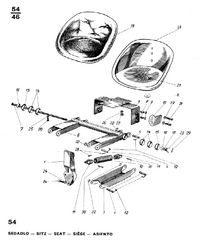
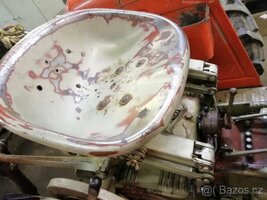
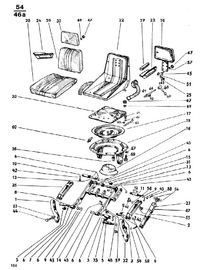
The original seats looked like this:
1728845175685.png99709227 (1).jpg

1728845194189.png sitz-suche.jpg
The first is a simple bucket seat. Mechanically sprung and with friction disc dampers.
The second is the Aerolastic comfort seat (optional). This is hydraulically dampened and also has an air cushion under the seat.
The Aerolastic seat is much more comfortable than the bucket seat.


Also from the instruction book it says there should be bolts to lock the front axle suspension for doing work with a front loader, what do these look like? Are they just normal bolts?
1728845561249.png
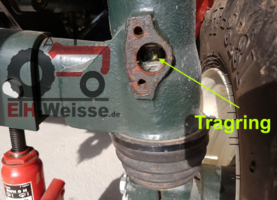
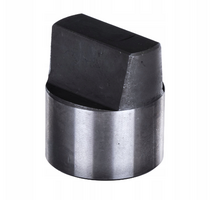
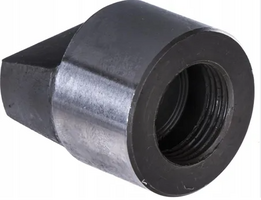
Behind the 4 covers (2 screws, 2 covers on each side of the axle, i.e. one cover from the front and one from the back) you can lock the front axle using the 4 locking bolts - you should definitely do this if you are using a front loader. Otherwise the spiral springs in the axle will break relatively quickly, as they were not designed for such a load (such a weight).
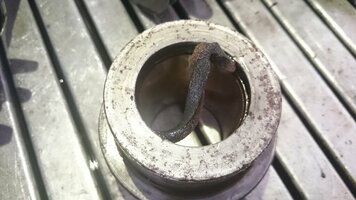
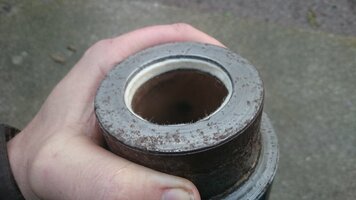
Die Bolzen schauen so aus:
1728845723897.png 1728845798778.png 1728845739177.png 1728845754335.png 1728845774719.png
If the springs are already tired, it may be necessary to relieve the front axle for assembly or disassembly in order to have the support ring in the middle of the opening.

1728845840199.png1728845861904.png
The bolt has the part number 55113636 (4x) and is manufactured with great precision and is also hardened. On one side there is an internal thread in a blind hole so that the bolt can be removed again.
1728845968330.png
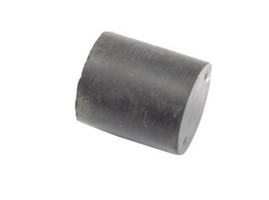
The rubber (55113637, 4x) is designed to ensure that the locking pin is always pressed tightly against the support ring of the lid. The lid is normally sealed with a paper seal to prevent water from getting in - but if you apply enough grease to it, you can do without the paper seal if you like.
 
Hello and welcome Ludvig! :)

Your seat is not an original seat but a third-party seat (accessory). Therefore, you will not find it in any Zetor spare parts catalog.
The original seats looked like this:
View attachment 1817View attachment 1820

View attachment 1818 View attachment 1821
The first is a simple bucket seat. Mechanically sprung and with friction disc dampers.
The second is the Aerolastic comfort seat (optional). This is hydraulically dampened and also has an air cushion under the seat.
The Aerolastic seat is much more comfortable than the bucket seat.


View attachment 1822
Behind the 4 covers (2 screws, 2 covers on each side of the axle, i.e. one cover from the front and one from the back) you can lock the front axle using the 4 locking bolts - you should definitely do this if you are using a front loader. Otherwise the spiral springs in the axle will break relatively quickly, as they were not designed for such a load (such a weight).

Die Bolzen schauen so aus:
View attachment 1823 View attachment 1827 View attachment 1824 View attachment 1825 View attachment 1826
If the springs are already tired, it may be necessary to relieve the front axle for assembly or disassembly in order to have the support ring in the middle of the opening.

View attachment 1828View attachment 1829
The bolt has the part number 55113636 and is manufactured with great precision and is also hardened. On one side there is an internal thread in a blind hole so that the bolt can be removed again.
View attachment 1830
The rubber (55113637) is designed to ensure that the locking pin is always pressed tightly against the support ring of the lid. The lid is normally sealed with a paper seal to prevent water from getting in - but if you apply enough grease to it, you can do without the paper seal if you like.
Thanks for the reply! That explains why I couldn't find that seat in a spare parts catalog, I guess I'll have to fix the issue with the seat some other way. It's odd since if I google adverts for these tractors on sale in Sweden they all seem to have this seat so it must be something they mounted to the tractors here locally in Sweden I assume. Thanks for the part number for the bolt I'll have to order some of those, the previous owner said he hadn't used the front loader that much so hopefully the springs aren't too worn out. But first off I'll have to fix the massive crack in the front loader before it does any front loader work šŸ˜.
 
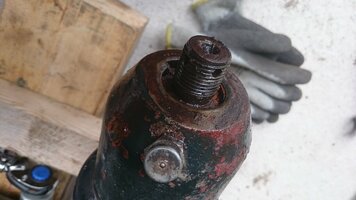
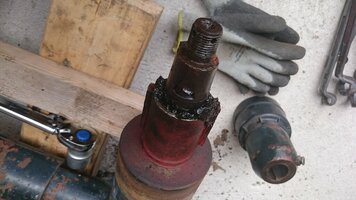
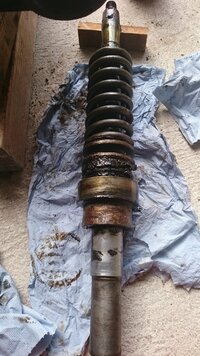
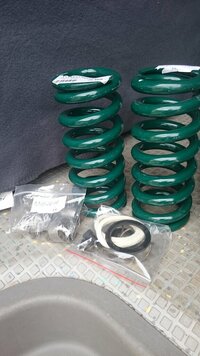
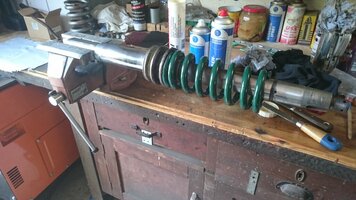
I don't know if I should continue this thread or make a separate one but I have a question regarding this tractor. I am changing the plastic cover on the top of the "spindle" and the rubber boot at the bottom and I noticed that the entire "spindle", "axle" or "pin" or whatever I should call it has a little bit of play, I assume that there is a bushing inside where the spring is that is probably a little bit worn. It's very slight but I assume I'll have to change it in the future especially as I will be using a front loader so the front axle will have more wear.

I guess I would have to take apart the spring to do this but I don't know how I would do that safely without getting a massive spring right in my face, do I just lock the springs in place with the locking bolts? Maybe I'm not reading the workshop manual right but I can't really see any way that describes how to safely remove the springs.

Also how urgent is it to change these bushings? The play is very very slight but I would still like to change it but maybe I don't have to immediately change them.

Another question I have is is there a good way to take apart the centrifugal oil filter? I managed to take it apart already but it was kind of hard to do so I assume there is a better way. The issue I had was trying to remove the 32 mm nut on the top of the filter which liked to just spin the entire filter. I ended up taking a 10 mm socket and holding it against the small nozzles or whatever they are on the top of the filter then holding that against the engine block to take off the nut but it was a bit challenging, I assume theres a better way to do this.
 
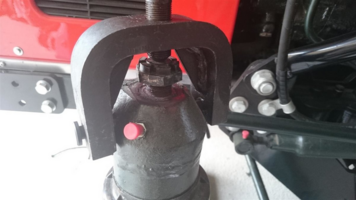
First loosen the large nut on top of the steering arm and then loosen the steering arm itself.
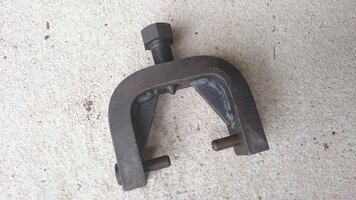
First you need a tool similar like this (this one here is an original one):

1731870802663.png DSC_2141.JPG
But leave the nut on the thread!

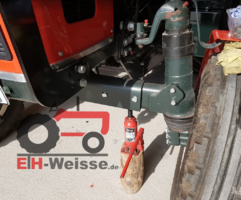
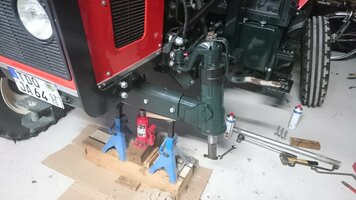
Then prepare the tractor under the front axle for jacking up, but don't jack it up yet, just prepare it with squared timbers or a support stand.
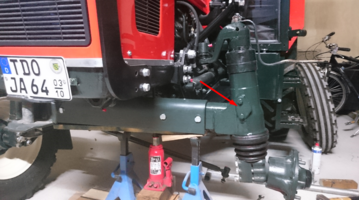
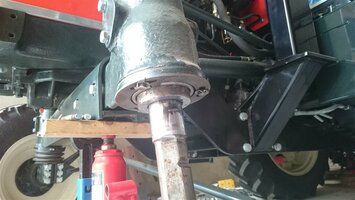
Then remove the wheel and place a jack under the steering knuckle pin and push it upwards, this relieves the load on the screw connection at the bottom of the steering knuckle housing.
DSC_2544 (Mittel).JPG

You can now loosen and remove this.
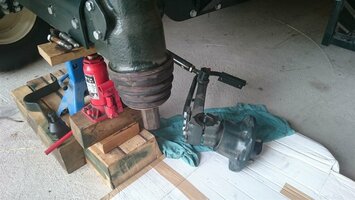
Then slowly lower the jack so that the front axle is sitting on the prepared support stand. Now take the jack completely away and remove the large nut on top of the steering lever. Now everything more or less "falls apart"... it's actually quite simple to build.

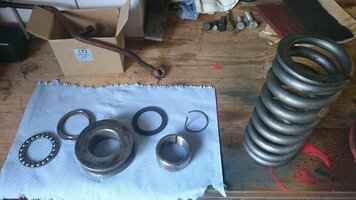
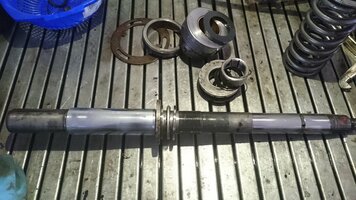
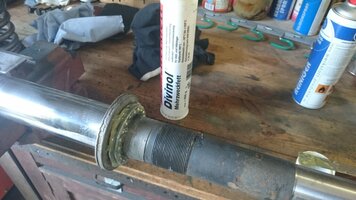
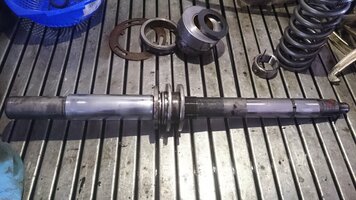
If in doubt, you should change the bushings - your front loader puts a lot of strain on the axle and all the bearings on the front axle should always be kept in very good condition. Don't forget the axial ball bearing, I would definitely replace that, but with a branded bearing (SKF, INA, SLAVIA, ZKL/ZVL).

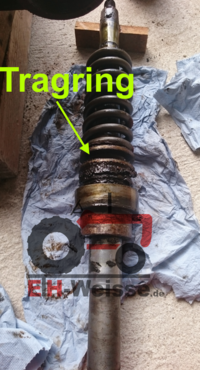
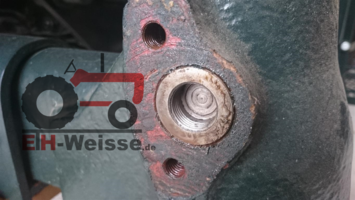
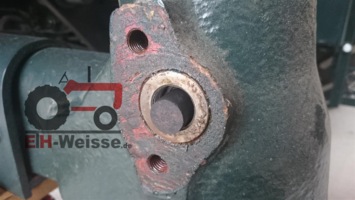
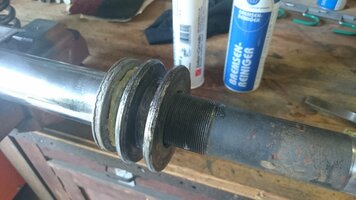
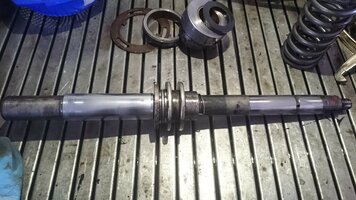
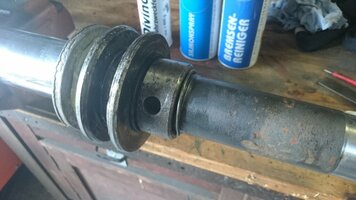
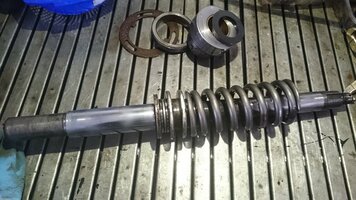
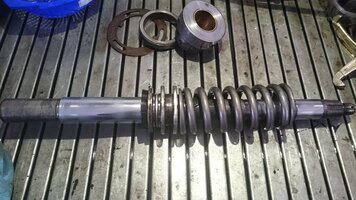
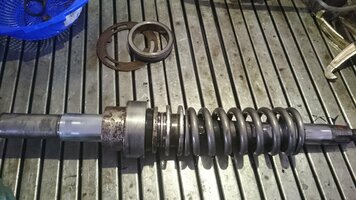
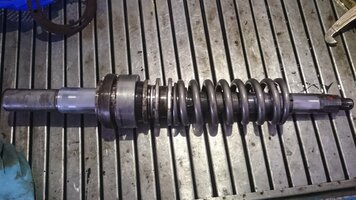
Some pictures around this...
DSC_2123.JPG DSC_2540 (Mittel).JPG
DSC_2143.JPG DSC_2144.JPG
DSC_2152.JPG DSC_2138.JPG

Remount:
DSC_2583.JPG
DSC_2160.JPG DSC_2589.JPG
DSC_2159.JPG DSC_2592.JPG
DSC_2158.JPG DSC_2594.JPG
DSC_2157.JPG DSC_2597.JPG
DSC_2156.JPG
DSC_2155.JPG
DSC_2154.JPG

You should made this also new:
DSC_2153.JPG DSC_2164.JPG
 
First loosen the large nut on top of the steering arm and then loosen the steering arm itself.
First you need a tool similar like this (this one here is an original one):

View attachment 1990 View attachment 1991
But leave the nut on the thread!

Then prepare the tractor under the front axle for jacking up, but don't jack it up yet, just prepare it with squared timbers or a support stand.
Then remove the wheel and place a jack under the steering knuckle pin and push it upwards, this relieves the load on the screw connection at the bottom of the steering knuckle housing.
View attachment 2012

You can now loosen and remove this.
Then slowly lower the jack so that the front axle is sitting on the prepared support stand. Now take the jack completely away and remove the large nut on top of the steering lever. Now everything more or less "falls apart"... it's actually quite simple to build.

If in doubt, you should change the bushings - your front loader puts a lot of strain on the axle and all the bearings on the front axle should always be kept in very good condition. Don't forget the axial ball bearing, I would definitely replace that, but with a branded bearing (SKF, INA, SLAVIA, ZKL/ZVL).

Some pictures around this...
View attachment 1992 View attachment 1993
View attachment 1994 View attachment 1995
View attachment 1996 View attachment 1997

Remount:
View attachment 2007
View attachment 1999 View attachment 2008
View attachment 2004 View attachment 2009
View attachment 2003 View attachment 2010
View attachment 2002 View attachment 2011
View attachment 2001
View attachment 2000
View attachment 1998

You should made this also new:
View attachment 2005 View attachment 2006
Thanks for the good instructions and photos of how to fix it
 

Users who are viewing this thread

Back
Top