• Hello.
    In order to download file attachments or view image attachments in full size, you must be registered/logged in and have a level 2 member account.
    No worry, its all for free!
    For more details - click here.

question Old bucket seat from Zetor 3511

Norway moliner

Zetorworld specialist
Level 2
Joined
Nov 20, 2023
Messages
48
Location
Norway
First name
Lars

Machinery:
Zetor 3511, 1968
Hello fellow Zetor friends :)
I'm renovating the old bucket seat on my 3511. The tractor stood still in a barn for about 25 years, and the whole seat foundation/frame is rusted solid. Nothing is moving :).
So I'm dismantling everything, and (after sanding and painting) It will hopefully be good again.
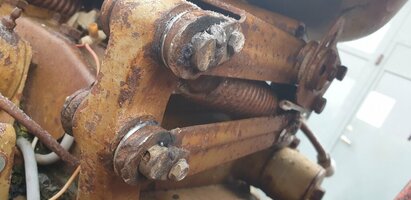
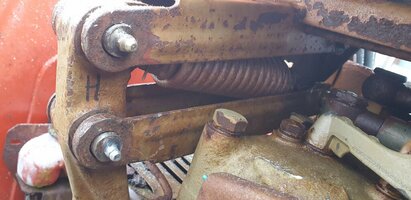
When taking out the pins/bolts holding the moving frame parts together, I noticed there are some kind of shim between the pin and the hole.

What is it called, and what is the purpose of this?

Found this video on the tube where this guy is doing the same job, but I don't speak the language....

View: https://www.youtube.com/watch?v=HK8cjQyFxsI&t=1068s
From about 17:40 into the movie, you can see he starts to prepare these shims.
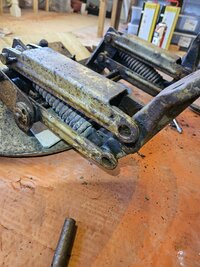
20240925_184438.jpg
 
I just assembled and install the seat on my '71 3511. It was totally frozen with rust, took a lot of beating and finally a 20 ton press to push out the pins. All shims and fasteners ruined. The original bushing material looked like brass net with graphite. It is approx. 0.5mm thick. I replaced it with what I had at hand, brass tubing from a sink 😊 Drilled out the pins and added grease nipples, put everything in position and fixed the pins by 6mm bolts and small fins welded to the end of the pins. Not pretty but will surely outlast me 😁
 

Attachments

  • 20241017_102807.jpg
    20241017_102807.jpg
    89.3 KB · Views: 8
  • 20241017_102745.jpg
    20241017_102745.jpg
    109.9 KB · Views: 7
I just assembled and install the seat on my '71 3511. It was totally frozen with rust, took a lot of beating and finally a 20 ton press to push out the pins. All shims and fasteners ruined. The original bushing material looked like brass net with graphite. It is approx. 0.5mm thick. I replaced it with what I had at hand, brass tubing from a sink 😊 Drilled out the pins and added grease nipples, put everything in position and fixed the pins by 6mm bolts and small fins welded to the end of the pins. Not pretty but will surely outlast me 😁
Thanks Thor,
those pins are really difficult to get out, for sure. I have 2 left now, and I will try with a press (like you did).
So you drilled a hole into the pins, and then a hole on the side (for the grease to come out)? Great idea!
Looks like you replaced the nylon washers with metal ones?
 
When taking out the pins/bolts holding the moving frame parts together, I noticed there are some kind of shim between the pin and the hole.

What is it called, and what is the purpose of this?
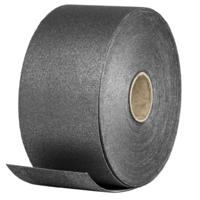
I Think its something like graphite sliding fabric/graphite covering like this here:
1729187087814.png

Realy good video too. :)
 
I Think its something like graphite sliding fabric/graphite covering like this here:
View attachment 1862

Realy good video too. :)
Thanks Joachim,
I will try to find something like that to use on my seat (y)
 
I mean in the video they talk about 0,5 mm thickness.

You can als try to talk with @Rico in the german www.Zetor-Forum.de - he do a similar job at a seat for Zetor 6948 this or last year.
 
I ended up with buying a small brass sheet of 0,4mm thickness.
Cut out little rectangles and "rolled" them into a bushing. That worked out great for me :)

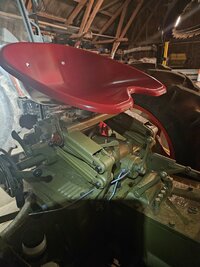
Here's the result (also bought a new seat):
20241210_210134.jpg
 

Users who are viewing this thread

Back
Top